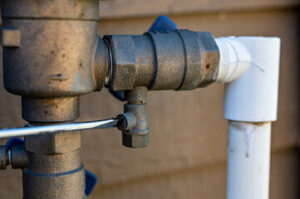
Drains clog when hair, food particles, soap residue, and other debris build-up. Foul odors are an indicator of this build-up, but they can be remedied with some simple tools.
First, try your plunger (or a specialized sink plunger) to break up the clog. If that doesn’t work, it might be time to use a homemade drain cleaner. Visit https://www.draincleaningphiladelphia.com/ for professional help.
Chemical drain cleaners are pure or mixed substances that help clear clogged pipes and fixtures. They are available in liquid, gel or powder form and can be purchased at hardware stores. These cleaners usually work through a chemical reaction with the materials that are causing the clog. Caustic drain cleaners, which are often referred to as lye or caustic soda, are bases that give or take away electrons from the clogging material, thus breaking it down and dissolving it. Oxidizing drain cleaners, which are formulated with bleaches, peroxides or nitrates, release oxygen that breaks down organic matter and eliminates bacteria. Both types of chemical drain cleaners are effective at removing many common clogs and are easy to use.
However, there are several disadvantages to using chemical drain cleaners. They can be dangerous to humans and pets, especially if they are ingested or come into contact with skin or eyes. They can also be hazardous to the environment if they enter waterways or groundwater sources. In addition, they can emit volatile organic compounds (VOCs), which are harmful to the environment and human health.
Another issue with chemical drain cleaners is that they are typically very strong, which means they can damage your pipes if not used properly. They can also irritate your nose, throat and lungs if they come into contact with your skin or inhaled. Long-term exposure to these chemicals may even lead to respiratory diseases such as asthma.
There are some good alternatives to chemical drain cleaners. One option is to use baking soda and vinegar, which creates a chemical reaction that helps dissolve clogs. Another option is to use hot water. You can start by pouring hot water down the drain, then follow it with cold water to flush out the pipes. Lastly, you can try a biological drain cleaner, which is made of natural products that are safe for your pipes and the environment. These cleaners typically take longer to work, but they are safer than chemical drain cleaners. It is best to use them as a last resort if all else fails.
Boiling Water
Clogged drains can be a major inconvenience. They block the flow of water, which leads to a backup of waste and can cause serious damage. This is why it’s important to keep on top of your home’s maintenance and cleaning so that clogs can be dealt with quickly and easily.
It’s not uncommon for people to pour boiling water down the drain as a DIY remedy for unblocking a drain, but this is a method that should be avoided. Pouring hot water down the drain can cause the pipes to corrode and may even soften or melt PVC joints. Instead, if the drain is completely blocked, a professional should be called to remove the blockage and clean the area.
Hair is one of the most common causes of clogged drains. It slithers down the pipe and often collects in hard-to-reach places, where it can bind with soap scum to form a sticky mass that’s difficult to dislodge. This mixture of hair and soap scum can also trap other debris in the drain, further reducing its flow. If the clog is all or partly due to grease, however, copious amounts of boiling water may help to wash it away.
Boiling water can be used on its own or in combination with other natural products to create homemade drain cleaners. For example, a combination of baking soda and vinegar is a popular choice for tackling stubborn clogs. When these two ingredients are mixed, they react to produce carbon dioxide gas and sodium acetate, which break down the gunk in your pipes.
Other DIY drain cleaners include hot water, coke, and Vaseline. The phosphoric acid in Coke can help to dissolve certain types of buildup, while Vaseline’s petroleum jelly properties make it an excellent substitute for mineral oils and paint thinner (which are both dangerous to use).
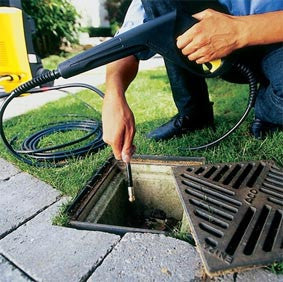
By taking preventative steps to ensure that your drains remain clear and flowing smoothly, you can avoid the stress of a clog and the need to call for professional help. Regular drain cleaning is far less expensive than repairing or replacing damaged pipes.
Baking Soda & Vinegar
Baking soda and vinegar are household staples with a long list of cleaning applications. They’re both powerful cleaners with their own sanitizing perks, and they work well in conjunction to lift stains and cut grease. The bubbling chemical reaction they create makes them an effective substitute for caustic and hazardous commercial drain cleaners.
Many people are tossing out the harsh chemicals in their cleaning products and using natural ingredients, including baking soda and vinegar, to clean their homes. These affordable and readily available powerhouse cleaners can lift dirt, disinfect surfaces and leave areas shiny and clean.
When you mix vinegar and baking soda, a bubbling reaction occurs between the two substances, releasing carbon dioxide gas. The reaction can be messy, but it’s not dangerous. The fizzing action of the reaction also loosens gunk, making it easier to wipe away.
Vinegar and baking soda are on opposite ends of the pH scale, meaning that they neutralize each other’s acidity. The result is a powerful cleaner that’s safe to use on most surfaces.
The acid in vinegar breaks down baking soda, creating sodium acetate and liquid water. Sodium acetate is a powerful deodorizer and can dissolve greasy molecules, which is why it’s found in many commercial cleaning products.
Vinegar can be used alone or mixed with baking soda to clean most surfaces in the kitchen, including sinks, counters and floors. It’s also a great alternative to chemical drain cleaners, and it works just as well in unclogging the toilet. Pour a cup of vinegar and a half-cup of baking soda down the drain, let it react for about three to five minutes, then flush with hot water. This method can also be used to clean the clogged drain in a shower or bathtub. If the drain is completely clogged, call in a professional plumber to use a high-pressure drain cleaning machine. This method of clearing a drain is not recommended for cast-iron pipes, which can be damaged by the caustic and corrosive mixture. If you do decide to try it, make sure the pipe is completely clear before putting in the baking soda and vinegar solution.
Biological Cleaners
Bio-enzymatic cleaners are live solutions that use strains of safe, natural bacteria along with specially selected enzymes to break down soiling, stains and malodours. These bacteria digest organic waste turning it into carbon dioxide and water, which they use to feed themselves and sustain their life.
These products are safe to use as they do not contain any chemicals. This makes them much safer for people to work around, especially those with allergies and sensitive skin. They also tend to be more environmentally friendly, relying on natural processes rather than harsh chemicals, and many are even fully biodegradable.
As an added benefit, bio-enzymatic cleaners are normally more cost-effective than traditional chemical cleaners. This is because they can be used at lower temperatures and can often keep working for up to 80 hours after application. This can help reduce cleaning costs by reducing the need for regular and costly deep cleans.
The best way to use a biological cleaner is by spraying it over the affected area. Allow it to sit for 5-10 minutes before wiping away with a damp cloth. It’s important not to spray any other cleaning product over the area, as this can stop the bacteria from breaking down and removing the contamination.
Biological cleaners are particularly effective for drains as they can penetrate through cracks and crevices where other cleaners may struggle to reach. They are also commonly used for cleaning greasy utensils, washing machines and deodorising toilets.
They can be used with a variety of surfaces and materials, but they are not recommended for use on abrasive or acidic surfaces as they can damage them. It’s important to test any bio-enzymatic cleaner on a small area of a surface before using it to ensure it won’t cause damage or discolouration.