When a water heater exhibits signs of wear and tear, Water Heater Replacement Denver is often more cost-effective than repairing it. This is especially true when the old unit is reaching the end of its lifespan.
If your hot water has a garlic odor or is discolored, this may indicate an anode rod problem. This can be easily remedied.
Located on the top of your water heater tank, the anode rod is an essential part of your hot water heater. It has a steel core wire with magnesium, aluminum or zinc wrapped around it. The anode rod is designed to exist for a short time, but when it wears out, it will attract the minerals in your water and cause them to corrode instead of the tank or any other exposed metal in the system.
The type of anode rod you need depends on the quality and mineral content of your water. Generally, magnesium rods work better in soft water, while aluminum is appropriate for hard water with a high PH level. You can find anode rods at home centers or online, but you should talk to a professional before making a purchase. Some anode rods are nipple-type and are attached to the hot water outlet, while others are plug-type and are installed on the top of the tank in a separate opening.
It is recommended to replace the anode rod every three to five years, depending on your mineral content and usage levels. If you neglect the anode rod, it will eventually corrode away and leave your tank vulnerable to rust & leaks.
Some warning signs that the anode rod needs replacing include a rotten egg smell in your hot water, the tank making loud or multiple popping noises while heating up, or dark water coming from the hot water outlets. Performing a simple water quality test, such as a pH test kit (available at home improvement stores), will also help you determine when to change your anode rod.
When you need to replace the anode rod, it is important to shut off both the power and the water. This can be done by turning off the circuit breaker on a gas-powered hot water heater or locating and shutting the valve on the cold water line at your meter. It is also a good idea to drain the hot water tank and take note of its condition so you know what to expect when it comes time for anode rod replacement.
The Dip Tube is a small yet vital part of your water heater. This unsung hero transports cold water from the top of the tank to the bottom so that it can be reheated by the burner. Without this crucial component, your hot water supply would be lukewarm at best and cold at worst. However, the dip tube can’t last forever. It is subjected to constant exposure to changes in water temperature, and mineral deposits can slowly wear it down over time.
When a dip tube becomes defective it will fail to carry the cold water down to the bottom of the tank where it can be reheated. Instead, the cold water will mix with your lukewarm water supply. This isn’t a permanent problem, but it will impact your daily routine until the defective tube is replaced.
Most modern water heaters use plastic dip tubes. These have a higher tolerance for the changing temperatures of your hot water supply than metallic tubes used in previous generations. Unfortunately, these dip tubes can still disintegrate under the stress of frequent hot water use. As they break down, they scatter white plastic fragments inside the tank, which can cause clogging at faucets and reduce your overall hot water supply.
Replacing a dip tube is fairly easy and doesn’t require any special tools. Start by turning off the circuit breaker that delivers power to your water heater and disconnecting the cold water supply line. Next, remove the pipe nipple and connector from the top of the tank. Use a flat screwdriver to loosen and then pull out the old dip tube. Once you have removed it, replace the new tube by inserting it into the inlet and pushing it in all the way. Make sure the curve on the end of the tube points away from the drain valve.
Once the dip tube is replaced, it’s important to restore power to your water heater and to reconnect the cold water line. You’ll then want to turn on the water and flush out your tank by running a few hot water faucets.
A gas water heater has a thermocouple to keep the pilot light lit. It also tells the thermostat when to turn on the main burner. If the thermocouple isn’t working properly, the pilot light will go out and the gas valve won’t open. Thermocouples are fairly easy to replace if you know what to look for.
First, you will need to shut off the gas supply valve. Then, you can start by unscrewing the nut that secures the thermocouple to the control unit with an open-end wrench. This will allow you to separate the two metal rods that make up the thermocouple. Then, you will need to test the temperature of the thermocouple. Use a multimeter to check the voltage between the hot and cold junctions of the thermocouple. You want to see a voltage of at least 20MV.
The thermocouple must be insulated from all other materials, except for the temperature sensing junction. This means that the thermocouple must be made of materials that will withstand high temperatures without deteriorating or melting. Most of the time, thermocouples are made from nickel or platinum. However, other metals such as copper, iridium, constantan, chromel, and iron are used as well.
If the tip of the thermocouple isn’t slightly touching the flame, you may need to clean it. Soot and residue can block the flame and prevent the thermocouple from producing a voltage. You can also bend the tip of the thermocouple to make sure it is engulfed by the flame.
Since the thermocouple is such an important part of your gas water heater, it’s a good idea to call in a professional to do the repair. This is especially true if you aren’t familiar with working on gas water heaters.
You can find replacement thermocouples online or in home supply stores for a reasonable price. Be sure to match the length of the new thermocouple with the existing one and the thread type on your water heater’s gas valve. You can also purchase a “universal” thermocouple, which works on most brands of water heaters. It will save you the cost of having to wait for a manufacturer’s thermocouple to be shipped.
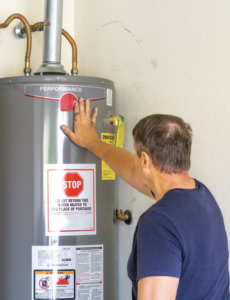
The water heater’s pressure valve, also known as a temperature-and-pressure relief valve (T&P), is one of the most important components on your unit. This small metal valve is responsible for keeping your family safe from catastrophic failures by ensuring that the water in your tank is under a certain amount of pressure and temperature.
Located on the top or side of the water heater, the T&P valve looks like a flat “T” with one end attached to the water heater and the other end with a lever that can be operated. This lever can be pulled to release the built-up steam and hot water, lowering the internal pressure and temperature.
Although some leaking is normal, you should test your T&P valve regularly to ensure that it is working correctly. You should start by shutting off the power and gas to your water heater, turning off the water supply, and then removing the discharge tube from the valve. Place a bucket under the discharge pipe to catch the water and then open the valve by pulling the handle on the T&P valve.
If the valve is operating correctly, you should hear and see a rush of air and water flow into your bucket. If you don’t hear or see this, the valve is likely encrusted with minerals and will need to be replaced.
After the test, close the valve and turn back on the water supply. When the valve is reopened, it should snap back to its original position very quickly. If you hear dripping, or the valve doesn’t snap back to its original position, it is not functioning properly and needs to be replaced.
The T&P valve is a very small component with massive responsibility, and it should be tested regularly to ensure that it is in good working order. If you notice that your valve is leaking or that it doesn’t function as intended, then you should call your local plumbing experts to schedule a professional inspection.